Over the last several decades, kitchen appliances have seen a variety of technological breakthroughs, from the George Foreman Grill to instant-boiling taps.

Despite the range of inventions, innovations and advances, the humble oven has stood firm as a tried and true mainstay of the kitchen.

However, the ovenary option of gas and electric has long been a hot debate, with both sides of the argument staunchly loyal to their preferred supply.

So, which one is better? Let’s find out as we turn up the heat on gas ovens vs electric ovens, in the ultimate battle for kitchen supremacy.
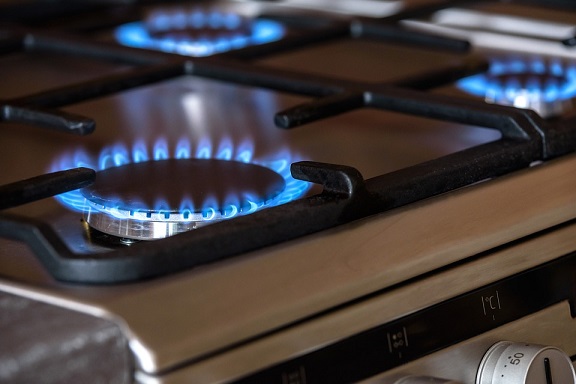
 

gas vs electric oven, gas oven vs electric oven


Pros and Cons of a Gas Oven

If you think a gas oven will provide more of a spark to your culinary capabilities, check out these pros and cons and give yourself a balanced view.


Benefits of a Gas Oven

Gas ovens tend to heat up very quickly, speeding up the overall cooking process as it reduces the time needed to pre-heat the oven to the desired temperature.

They also provide a levelled heat distribution which can be useful for achieving different results while cooking things at the same time; e.g. cooking meat on the bottom shelf and roast potatoes on the top.


Disadvantages of a Gas Oven

Gas installation is a specialist skill and can be extremely dangerous if conducted by an untrained amateur. As such, you’ll need to enlist the aid of a qualified gas professional to install your gas oven safely. Naturally, this will usually come with a price tag.

Gas ovens usually won’t feature a fan either, which can make it harder for heat to circulate. While this can be great for achieving varying cooking results (as noted above), it can result in an uneven bake and require some serious shelf juggling if you’re looking to achieve the same results for multiple trays.


Pros and Cons of an Electric Oven

If you’re switched on to the idea of an electric oven, be sure to take the following into account for a well-rounded decision.


Benefits of an Electric Oven

While gas may have the edge in terms of heating speed, electric does tend to offer a quicker cooking experience.

Electric ovens tend to distribute heat more evenly, particularly fan-assisted ovens. This allows the hot air to be circulated around the oven, surrounding the item and cooking the food from multiple angles.


Disadvantages of an Electric Oven

As noted earlier, electric ovens can take a long time to heat up, extending the cooking time by potentially up to 30 minutes. It also retains its heat for a long period of time, making adjusting temperature tricky at times.

Perhaps the biggest disadvantage of electrical ovens is that they can be a notable casualty when a power cut occurs. If the power is down in your area and your midway through an oven bake, it’s an immediate roadblock that doesn’t have a detour.


Is Gas Cheaper Than Electric?

In short, yes. Cooking with gas typically works out notably cheaper than cooking with an electric oven.

One study by consumer watchdog Which? found that cooking with a gas oven worked out over 50% cheaper than cooking with an electric oven over the course of a year.

In addition to that, gas cookers are also typically cheaper to purchase up front as well, providing savings on a number of levels.


Gas Cooking vs Electric Cooking

While your decision will likely come down to costs, efficiency and practicality, it’s also important to note that gas cooking also provides a different cooking style to electric.

Gas ovens provide heat with more moisture than electric, culminating in a dish that itself is ultimately more moist. This prevents certain dishes from drying out and can make all the difference when cooking items like meat.

Meanwhile, electric ovens provide a drier heat that’s perfect for achieving crispier textures. This is particularly helpful when baking cookies of crisping up chips.


Which is Better - Gas or Electric?

Ultimately, who prevails in the battle between electric and gas depends largely on your own preferences and desired methods of cooking.

While gas can be cheaper in the long run, it does require specialist installation, whereas an electric model simply needs an outlet. That being said, if you live in an area where power cuts are common, an electric oven can be an unreliable solution.

The differences in cooking quality and end result can also be a decisive factor, while many will simply opt for what they are familiar with in a “better the devil you know” mindset. That being said, if you really are torn, there are hybrid options that provide the best of both.

Whichever option you ultimately go for, you can be sure that Cooker Spare Parts will have you covered if you need a replacement component, new rack or a spare tray to go with it.


If you need any help making up your decision, why not drop us a line today? Call now on 02920 452 510 or get in touch online using the link below.

Get in Touch

If your cooker hood's extraction power is at an all-time low, it's probably time to replace some parts and give it a bit of TLC. Cooker hood filter replacement is a fairly simple task, just follow these steps and your kitchen will be steam and smell free again in no time! Note: most cooker hood filters need replacing every four to six months.

To Replace Your Cooker Hood Filter

You Will Need:

  • New filter (grease or carbon filter, depending on hood model & cooker type)
  • Screwdriver
  • Optional: warm soapy water, rubber gloves

Step 1: Preparation

Before making a start on your cooker hood filter replacement, there are a few things you need to do. Firstly, take a look at your cooker hood and make sure you've purchased a compatible replacement filter. You can find a huge selection of replacement filters to suit your cooker hood here, in our range of cooker hood filter spares.

Once you've got your spare filter, you need to disconnect your cooker hood from the mains (we don't want any nasty shocks here!)

Step 2: Pop the hood

Your cooker hood probably isn't going to pop open like a car bonnet... but the same principle applies!

Grab your screwdriver and unscrew any screws that prevent you from accessing the cooker hood filter. (Now's also the time to put those rubber gloves on if you don't want to end up with grubby, greasy hands).

Step 3: Replacement time!

Once your cooker hood is suitably dismantled, it's time to have a look at the damage inside. If your cooker hood hasn't been working as it should for a while, it's likely you'll see a nasty buildup of grease over the cooker hood filter. 

  • Unscrew/unclip the existing filter.
  • Take it out of the cooker hood and discard.
  • Fit your new filter in its place. If you've got a universal filter, you may need to cut it down to size.
  • Screw or clip the new filter in place, making sure it's secure.

Some cooker hood models will have a metal grease filter rather than a typical fabric one. These filters can be removed, rinsed using a warm soapy solution, left to dry and re-inserted back into your cooker hood. Simple!

So there you have it, cooker hood filter replacement in just a few easy steps. If you have any questions, or if you need help finding the right cooker hood filter replacement for your cooker, don't hesitate to get in touch with us. Call us on 02920 452 510 now!

Those that spend a lot of time in the kitchen will know all too well that cooking appliances are far from perfect.

When it comes to ovens, they are by no means an exception to the rule and this fact also extends to the oven knobs attached to the cooker.

Many oven knobs have the temperature markers printed onto the dial itself. As such, the likelihood you may rub out some of the markings over time is pretty high.

That being said, just because your cooker knob is missing its markers doesn’t mean you have to lose your marbles. There are a couple of handy hacks that can help you get dialled up again.


oven knob missing, cooker knob missing


Replacing the Numbers

Most ovens and cookers will have either a chrome, black or white front, with knobs of the same colour at the top of said oven.

A quick and easy albeit temporary workaround to this issue is to simply Google the make and model of your oven for an image of the cooker front. Assuming you can get a visible look at the dials, you can then proceed to mark on the key temperatures.

If you can’t locate a legible image, you may be able to find a usable depiction of the dial in the oven’s manual. While the images can vary from the real thing at times, it should give a decent idea of what temperature is marked where.


Replacing Numbers on Black Oven

For a white or chrome coloured oven front/knob, a black Sharpie is ideal; however, this can be a little more difficult if you have a black cooker. Try using a Tippex pen or a silver Sharpie.

If heat is a concern and you suspect that may be the reason behind your missing markings to begin with, it may be worth using heat-resistant paint – such as paint for ceramic tiles – or even nail polish.

If all else fails and you know you plan on replacing it, you may want to simply score in line markers over key temperatures with a sharp instrument as a means of keeping track.

While none of these solutions are ideal, they do provide a decent quick-fix that will see you covered for the interim until a replacement arrives.


Gauging Temperature

If you don’t have any imagery available and you really are stuck when it comes to what temperature marking goes where, all hope is not lost just yet – it’s time to go old school!

If your oven comes equipped with an oven thermometer, trial and error can get you where you need to be. Simply, turn the dial to where you roughly believe your most commonly used temperature is (e.g. 180), wait for the oven to heat up and check the thermometer.

After a handful of tweaks and retests, you should have a good idea what’s where and can mark accordingly using one of the methods above.


Replacing an Oven Knob Missing Markers

While the above techniques can be handy as a short-term stop-gap to keep your kitchen running, your oven cooking and your food the right side of cremation, your best bet is to order a replacement oven dial if your cooker knob is missing its numbers.

Luckily, you can replace a cooker knob with ease at Cooker Spare Parts. Simply head over to our Cooker Knob section, type in the make, locate the model you need and click the product you want to order – job done!


For more information on cooker knobs and replacement oven parts, drop us a line today on 02920 452 510 or click the button below to get in touch online.

Get in Touch

A noisy oven can be a major annoyance for any homeowner, particularly if you spend a lot of time cooking or hanging out in the kitchen.

However, a riotous racket from your cooker could be an indication of something far worse than just audio irritation.

If your oven is turning your kitchen into a clamorous karaoke of cooker noises, don’t chalk it up to being “one of those things” – it’s likely a sign that your oven is need of some overdue TLC.


why is my oven so loud ,noisy oven


Investigating a Noisy Oven

In addition to ruining the kitchen ambience with its dinnertime din, a loud cooker can also raise serious alarm bells over the health of your appliance.

A noisy oven can be a tell-tale sign of a serious problem with your cooker. Think of it as a cooker’s cry for help and your oven’s way of alerting anyone in earshot that it’s in dire need of assistance.

If your oven is making such a piercing plea, don’t read it the last rites and fork out on a replacement. The solution could be a lot simpler and a lot less expensive!


Diagnosing a Noisy Oven

More often than not, an uncharacteristically noisy oven typically points to an issue with the oven’s fan motor. That being said, most ovens have two fans: namely the cooling fan and the circulation fan.

Like any appliance, these components can and will wear over time as they reach the natural end of their lifespan. For oven motors, this often causes them to make a loud rattling noise when the oven is on.

To get to the bottom of it, it’s time to channel your inner sleuth and get inspecting. But remember, safety first, kids - be sure to disconnect your appliance from the mains before you do so.


Fixing a Noisy Oven

A noisy oven fan can be the result of something as simple as a loose blade or fixing nut. To eliminate this possibility, it’s worth tightening any loose screws/bolts to ensure everything is securely held in place.

Oven fans usually consist of three separate parts: the fan motor, the blade and the fixing nut. If all parts are securely in place and the noise still persists, you may need to replace a fan part.

If you have diagnosed your issue and would like a replacement fan/motor component, click the button below to browse our stock of replacement parts.

Browse Oven Fan Motor Parts


Replacing an Oven Fan

Once you’ve diagnosed the problem and identified the part that needs attention, you can now tackle the task of solving the issue and replacing the problem part. That being said, it’s often not as easy as you might think.

Replacing an oven fan can be both difficult and dangerous, particularly if you don’t know what you’re doing. What’s more, with so many oven brands, models and variations on the market, prior maintenance knowledge of one oven can be entirely different for another.

A botched DIY job could void your warranty, while a failed attempt of fixing the issue could exacerbate your problems even further. As such, if you’re unsure, your safest bet is to call in a pro to check it out for you.

That being said, if you are intent on flexing your mechanic muscles and intent on doing your own oven overhaul, be sure to do your homework beforehand. Consult your manual and research your oven’s make and model thoroughly before getting your hands dirty.


For more information on fan motors and oven fan parts, call now on 02920 452 510 or use the button below to drop us a message online.

Contact Us

If your oven is taking longer to heat up or you find your meals aren’t cooking evenly, it may be due to valuable heat escaping from your oven.

If your cooker is unusually venting heat, the most common cause of this issue is a worn oven gasket. The gasket operates as a seal, insulating your oven and preventing the hot air from escaping.

Naturally, any wear and tear to this seal will likely result in a dip in performance, not to mention a potential hazard, causing your oven to run less efficiently.

If this sounds familiar, don’t get hot under the collar or blow a gasket yourself – help is at hand!


heat escaping oven,heat escaping cooker


Prepare for the Worst

Like any kitchen appliance, an oven won’t last forever. Sadly, when it comes to oven cooking, Sod’s Law will usually dictate that your cooker will go to pot at the least convenient time.

Nevertheless, there’s never a good time to receive bad news, so the best way to limit the impact is to get ahead of the curve and prepare for the inevitable.

It can be wise to inspect your oven regularly, particularly at the first sign of an issue. This can help you to pre-empt a major fault and allow you to rectify the problem before your oven becomes completely unusable.


Diagnosing a Faulty Door Seal

While it can be both annoying and frustrating when your oven seal does eventually go down, it can also be largely foreseen if you know what to look for.

The tell-tale signs of a faulty gasket range from an unusually hot outer door to melted cooker knobs. Meanwhile, it could be something as simple as undercooked food.

If you spot any of the above, be sure to check the seal for any obvious signs of wear or damage. Cracked, split or eroded seals are not fit for purpose.

Next, turn the oven on and inspect the perimeter of the door for escaping heat. If heat is unusually permeating from the door, you’ll need to replace the gasket.

These steps should help identify any issues with the seal; however, if no seal issues are evident, you may want to enlist the help of an expert.


Replacing a Door Seal

Once you have identified the problem, your next port of call is to take appropriate action. For a broken seal, replacement is in the best place to start.

Luckily, replacing a cooker seal is fairly straightforward. Simply head over to our dedicated section of oven door seals and gaskets, locate the model required using our easy-to-use search tool and order your replacement door seal.

Once your substitute seal has arrived, it’s time for out with the old and in with the new!


Remove a Damaged Door Seal

Before you go any further, be sure to unplug your oven or switch it off at the mains. If your oven is hot, wait for it to cool before you attempt any repairs.

Once it’s safe to do so, remove the damaged seal by opening your oven door and locating the gasket. This will either be on the door itself or on the outer border of the oven opening.

The seal will often be held in place by small clips or pins at select points (often the corners). These can be easily removed by gently wiggling them out of place.

Once removed, prise away at the meshy perimeter to loosen it from the oven wall and proceed to gently pull away in a methodical manner.

Working around the boundary of the oven, pull away until the seal has been completely removed.


Fitting a New Door Seal

To replace the oven seal/gasket, you have to effectively work in reverse. With that mindset, feed the seal around the perimeter so that the pins/clips line up with the relevant holes.

Fasten the clips into place and ensure that the remaining lining is nestled comfortably in place around the outside.

Once the new gasket is securely in place and the clips have been fastened into their corresponding holes, feed any remaining excess into the two bottom holes provided to create the full air-tight seal.


For more information on replacing a cooker seal of replacing an oven gasket, why not drop us a line? Call now on 02920 452 510 or get in touch online using the button below.

Get in Touch